Introduction
Despite being called the Godot Game Tools this Blender add-on is of use to just about any game developer.
This tutorial aims to document how to combine multiple Mixamo models using Godot Game Tools.
This is written with the assumption that you can get Blender up and running, not that you can do modeling. The Author has zero artistic expertise and so assumes none from you either. If you’re a Blender power-user just skip the step-by-step bits – you might know them by heart (I don’t).
Mention will be made of the Castle Game Engine as this is the game engine of choice for the Author. However, the procedures outlined below are equally applicable to any game engine so if you’re a Godot, Unity, Unreal or something else developer then read on, the only requirement is that your own chosen game engine be able to handle the GLB / GLTF file format.
Outline
Mixamo is a site by Adobe that provides over 120 humanoid-type (arms, legs, head, etc – no tails, wings, etc) models along with over 2,500 fully rigged animations you can apply to one of the models they supply or one you upload (there are limitations with the uploaded models, we’ll get to that later).
Additionally, Mixamo has a small selection of animation packs that combine many animations so you can download your chosen model with one of these packs applied to result in a model with multiple animations you can switch between at runtime – if one of these packs has exactly what you want, use it (seems unlikely).
One problem with Mixamo is that if you find a bunch of animations you’d like to use you need to download each model with its animation so you end up with a lot of duplicated data – the model’s meshes, textures, etc will be in each animated model you obtain from the site.
The Godot Game Tools add-on for Blender solves this situation by allowing you to merge everything into one GLB / GLTF file keeping only one copy of the data that is common to all versions of a model/animation resulting in a much smaller file size than would otherwise be required.
Godot Game Tools is, sadly, poorly documented at the time of writing so this Tutorial will take you through the less than obvious steps required to convert the model files you download from Mixamo into one combined multi-animation model you can load with ease into CGE or any other game engine.
Getting started
The first thing you need is Blender. We’ll assume you’ve downloaded and installed it (if not, go to https://www.blender.org/download/ now, get it and install it because everything else needs it)
Now go and download the Godot Game Tools from https://viniguerrero.itch.io/godot-game-tools then once you’ve got the download extract Godot_Game_Tools.zip to a location you can easily find again in a moment.
The zip file contains both the Blender add-on in another zip file inside the blender directory and files specifically got Godot – we’re not going to touch the latter in this tutorial but require the former.
1) Start Blender and get past the splash screen
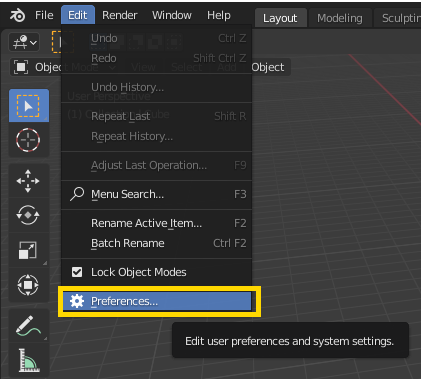
2) Select Edit -> Preferences
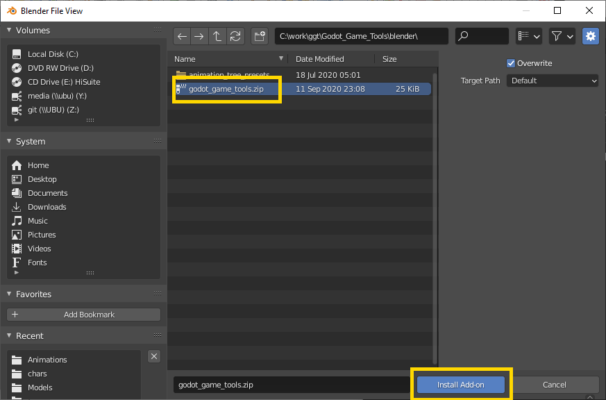
3) Click on Install
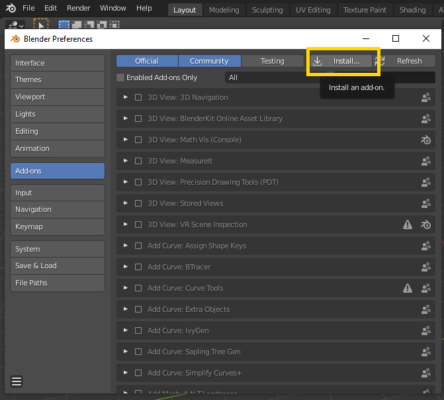
4) Navigate to <wherever you extracted the zip>/Godot_Game_Tools/blender
5) Click on godot_game_tools.zip to select it
6) Click on Install Add-on
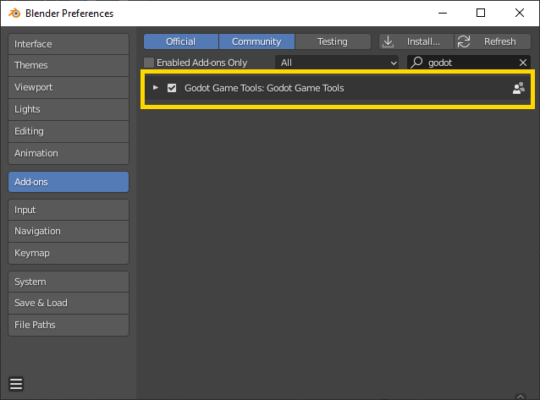
7) Make sure the Godot Game Tools is enabled (the box is checked)
OK, that’s it with Blender for now. You can close blender and fire up a web browser so we can go and get some models and animations.
Getting the Mixamo Model(s)
Point your web browser at https://www.mixamo.com/ As this is an Adobe site you’ll have to create an Adobe account if you don’t have one or sign in if you do. Don’t worry, this is one of the few things Adobe provides completely free of charge and the models are supplied without any restrictions (at least at the moment).
Once you’ve signed up / in you’ll see a screen that looks like this.
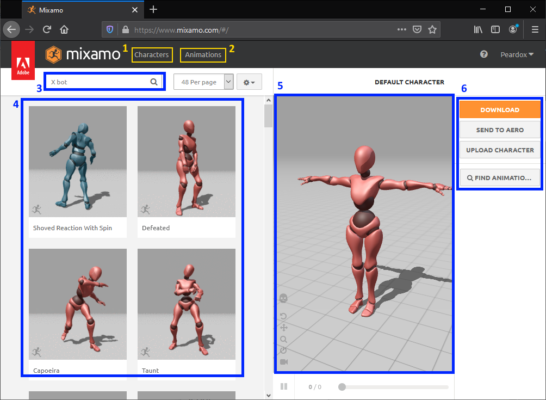
1) Switch to Character Selection mode
2) Switch to Animation Selection mode
3) Search Box to narrow results
4) Character Model Browser
5) Selected Model Preview
6) The all-important “Download” button (Upload will be discussed later)
Kindly wait before selecting Animation mode (won’t be long) so you get the same results as shown below.
Why not browse around the models, there are 121 to choose from at the time of writing. For the purposes of this tutorial, we’ll be using the Default Character pictured above as it’s nice and simple (less to go wrong). If you just want to dive straight in, feel free – just be aware that your screen will look different from this Tutorial later on.
Having said that by all means click on any model you think you may like to come back to later, it’s easy to get back to the stage you see above.
OK, now you’ve had a little browse of the models lets (optionally) get back to the “Default Character”. Simply type “X Bot” into the Search Box (3) and press Enter. Now you can select the model we’ll be showing for the rest of this part and all of the next.
With your chosen model selected it’s time to switch into Animation mode so click that button (2)

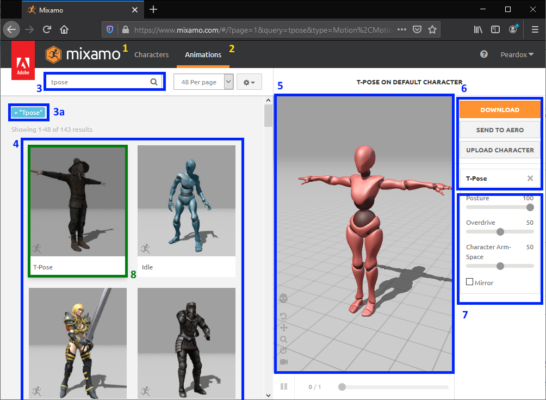
It looks like very little has changed, (4) is now an Animation Browser. Actually, this mode is somewhat different than the Character Selection mode. The Search box (3) will now offer you some categories or you can just type in some keyword like “die” to narrow the results. Also, note that using the search will result in Mixamo ‘remembering’ (3a below) the filters you chose (if you’re not getting any results check that you haven’t got any word in blue under the Search box – click the X next to the saved searches to remove them)
Go and select any of the Animations. As soon as you do the Selected Model Preview (5) will start showing your chosen model being animated in the style you selected. A new panel (7 below) will also appear under the Download button area (6) allowing you to control the settings the animation uses.
Play around with the options a bit to get comfortable with them. Two very useful boxes that appear in this new panel are “In Place” which, for example, can make a running animation keep the model from moving, and the “Mirror” option which, essentially, runs the animation in the other direction. Not all animations have all of the options available so have a good little exploration before we get back to the Tutorial.
Hopefully, you’ve found a nice little selection of animations you want to try combining in a little while. If you’ve downloaded some of them then fine, you can use them later in the tutorial to make things more interesting.
An extremely important animation is known as the T-Pose. It looks extremely boring and doesn’t actually move but is none-the-less vital to combining all the fancy dancing, fighting, running, jumping, etc animations you actually want. The T-Pose is a neutral pose, standing straight with arms extended, this particular animation makes all the others work properly – so let’s go and download one…
Type “TPOSE” into the search box (3) and then select the T-Pose (8). It’s is absolutely required that you get this animation if you want Godot Game Tools to combine everything else.
It’s now time to click the Download button (6) so save the T-Pose so go ahead and click the button.
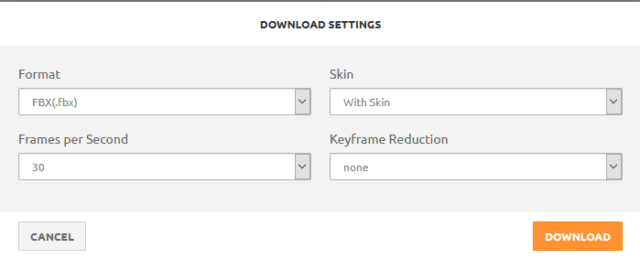
If you’re not using Unity then everything is OK, just click Download. Unity users – I guess the FBX for Unity (*.fbx) fixes import issues Unity reportedly had with Godot Game Tools.
As long as you end up with a skinned FBX downloaded to your drive everything is good. You may want to play with the other options (I haven’t bothered with the bottom two)
Now you’ve got your T-Pose go and choose some animations that interest you if you haven’t already and download those as well. One thing worth pointing out here is that the Skin is optional for all animations you download apart from T-Pose which must have the Skin (so you get the model data etc). Personally, I only bother with the Skin for the T-Pose.
Collect all the models together
OK, your Download directory now has T-Pose (with Skin) and a selection of other models (with or without Skins). If you’re trying to match this tutorial exactly we got the following animations in addition to T-Pose…
Northern Soul Spin
Walk in Circle
Sword and Shield Death
MMA Kick
Situps
Jogging (with In-Place selected)
Now you’ve got all your models move them somewhere sensible – a new folder is a good idea for this part.
Back to Blender
This section is the least obvious so even if you’re a Blender Guru please follow along step-by-step. We’re not going to be doing any modeling anyway. This is simply a case of following the instructions to combine all the animations into one and export the end result. After this has been done you can import the result back into Blender and play with the model if you want to.
1) Start Blender and get past the splash screen
2) Press the ‘A’ key
3) Press the ‘Delete’ key
4) Press the ‘N’ key
Your screen should now look like this (we’re only interested in the area marked in Yellow)
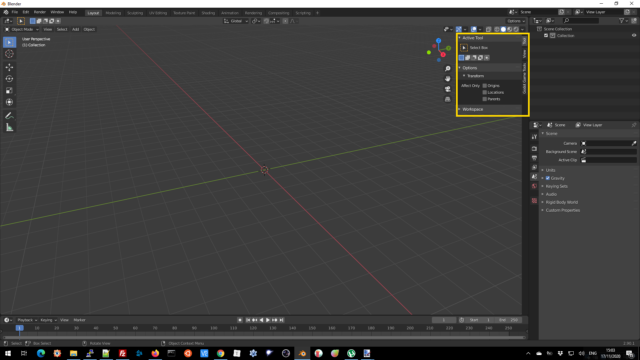
Select the Godot Game Tool tab to get to the options that let us merge all the models together.
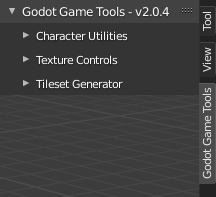
Select Character Utilities
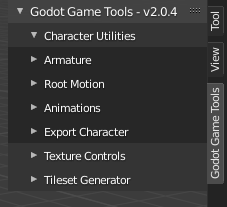
Select Armature
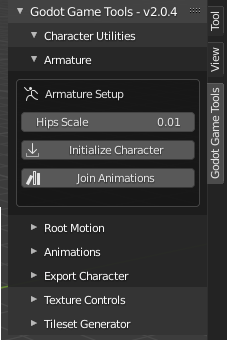
Select Initialize Character, a file selector will open
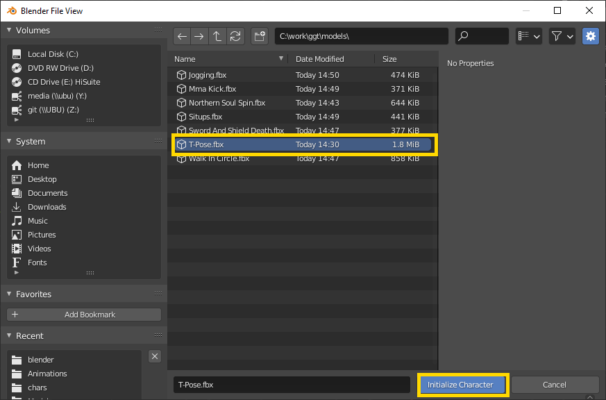
Select T-Pose.fbx
Click Initialize Character
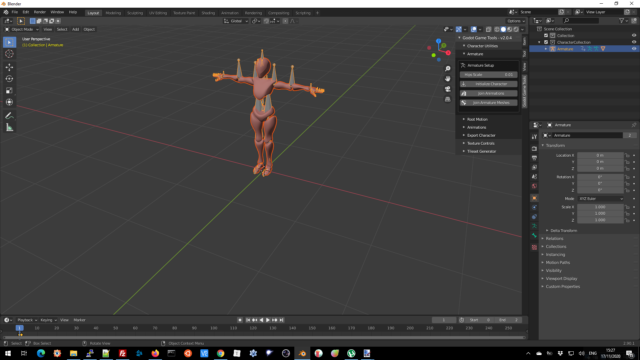
The T-Pose will now appear in the middle of the Blender workspace. Feel free to use the mouse to move your view closer to the model if you want but other than that leave it alone.
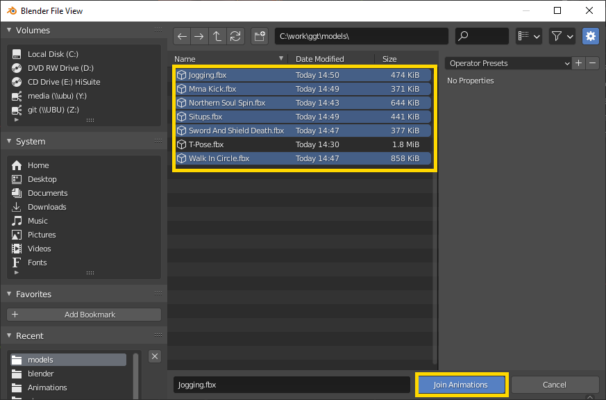
Select Join Animations, directly underneath the Initialize Character button in the Godot Game Tool tab, and another file selector will open
Select everything apart from T-Pose.fbx
Click Join Animations
Click on Animations underneath the section you’re currently working in (we’re done with Armature)
Click on Export Character underneath the section you’re currently working in (we’re nearly done)
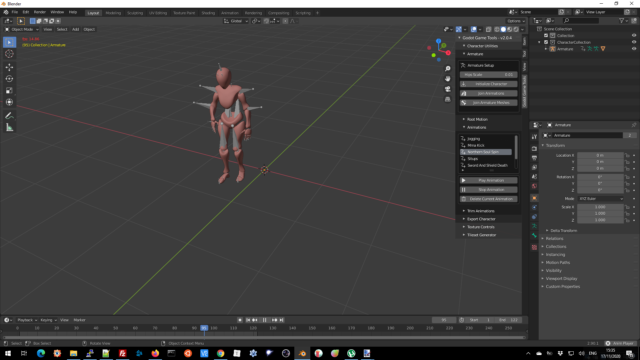
The animations section expands and you can see a list of all the extra animations you added
Click the Play Animation button under the list of animations and the animation will start playing
While animations are playing you can select a different one from the list and the animation will switch to that one.
Once you’ve had a good examination of the animations you’re almost done
It’s time to export the combined model so you can use it in your game (or in this case probably test you can if you’ve got anything like the mish-mash of animations we have <g>)
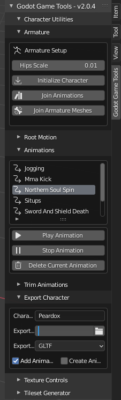
Enter a name for the Character, your exported file will be called whatever>.glb/gltf
Select gltf/glb – chose whichever is better suited to your choice of game engine
Click on Export Path and a directory selector will open – create a directory and select it, your files will end up here.
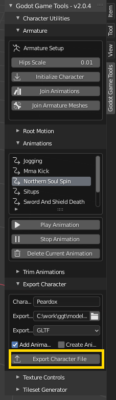
Paytime! Click that Export Character File button!
After a short delay while Godot Game Tool exports everything so you can close Blender, saving the project if you like (this not really necessary unless you want to add or or remove animations later).
We’ve finished!
If you followed this tutorial exactly then the resultant GLB/GLTF is about 70% (4.87M -> 3.40M) the size of all the parts that make it up even though the only model with a Skin was T-Pose, that’s a lot of duplicated data we’ve removed. If you exported full models or used different animations the difference may be far greater.
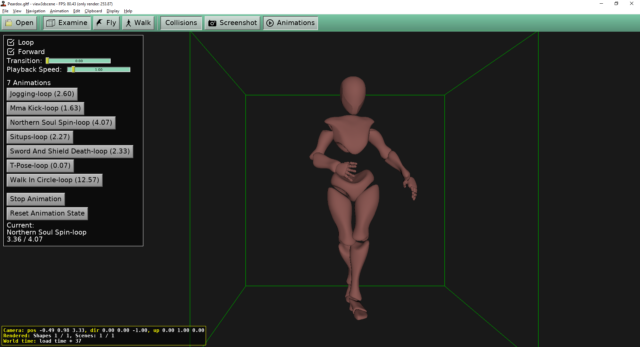
Examining your new creation
You can import the file you just exported back into Blender to play around with it.
You can write some little test application to play around with your new collection of animations.
Or, in my case, I’ll try it out with Castle Game Engine’s very own View3dScene so I can see how the model’s animations will look in my game